Category: DIY

  • So You Want A Southern Home? 5 Tips for Pretty Southern Style

    So You Want A Southern Home? 5 Tips for Pretty Southern Style

    Have you ever looked up the definition of Southern culture? Here’s the definition, according to Google: “Southerners have a very well developed culture, consisting of food, music, art, literature, and even manners that differ from the rest of America.” Isn’t it fabulous?!

    In addition to our rich culture, Southerners also have a distinct and sought-after style. So, how do you create a Southern-style home? Well, it’s more than hanging up a “Welcome Y’all” sign, but it also doesn’t need to be complicated or expensive either. You’ve probably flipped through countless glossy pages of iconic Southern homes in magazines, or created a “Southern Decor” Pinterest board, and thought, “How? How do I create this?”

    So, here are five, simple ways to update or create your own Southern home decor.

    pretty-southern-antiques

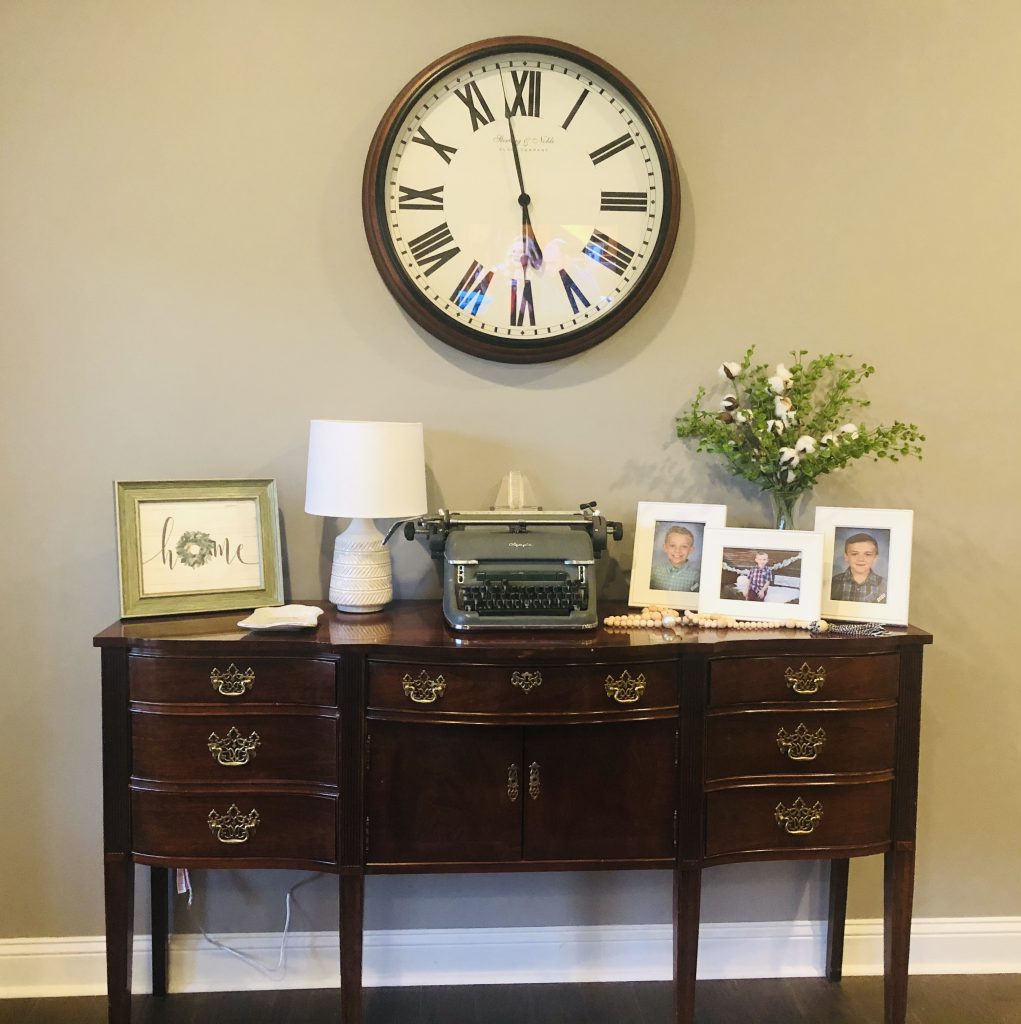
    1. Blending Something Old With Something New

    A key element of Southern style is to implement antiques. If you have a piece of furniture that has been passed down to you, make sure you make that a focal point in your home. Blending antique or older items, with modern style is a common theme in Southern homes, and easy to do! Oftentimes, that old family piece of furniture has a story behind it, which will make it a great conversation piece for you and your guests. No family heirlooms? That’s ok! Grab a friend and start scouring local antique and vintage market places or stores (check it out here)…you’ll be sure to find something that suits your style, and your budget.
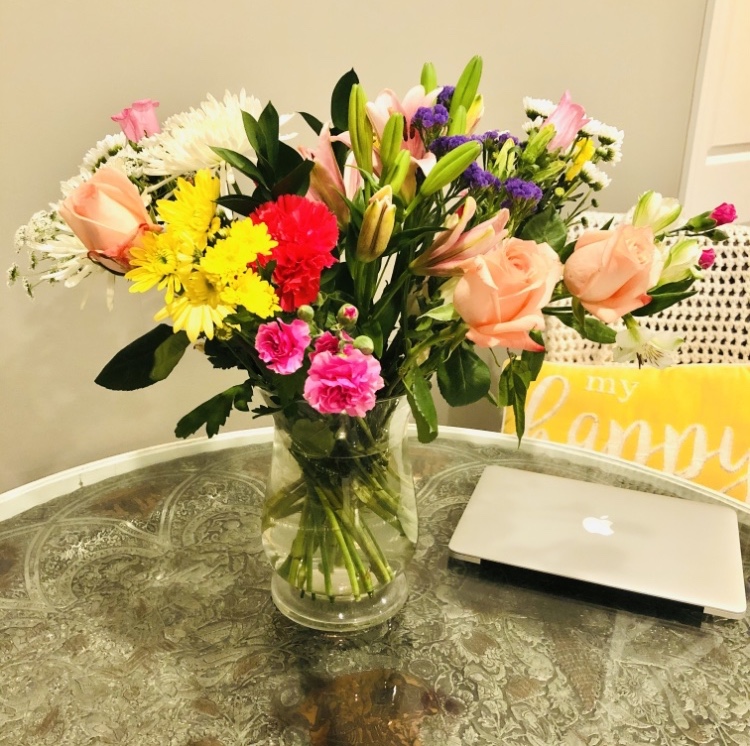
    southern-floral-centerpiece

    2. Flower Power

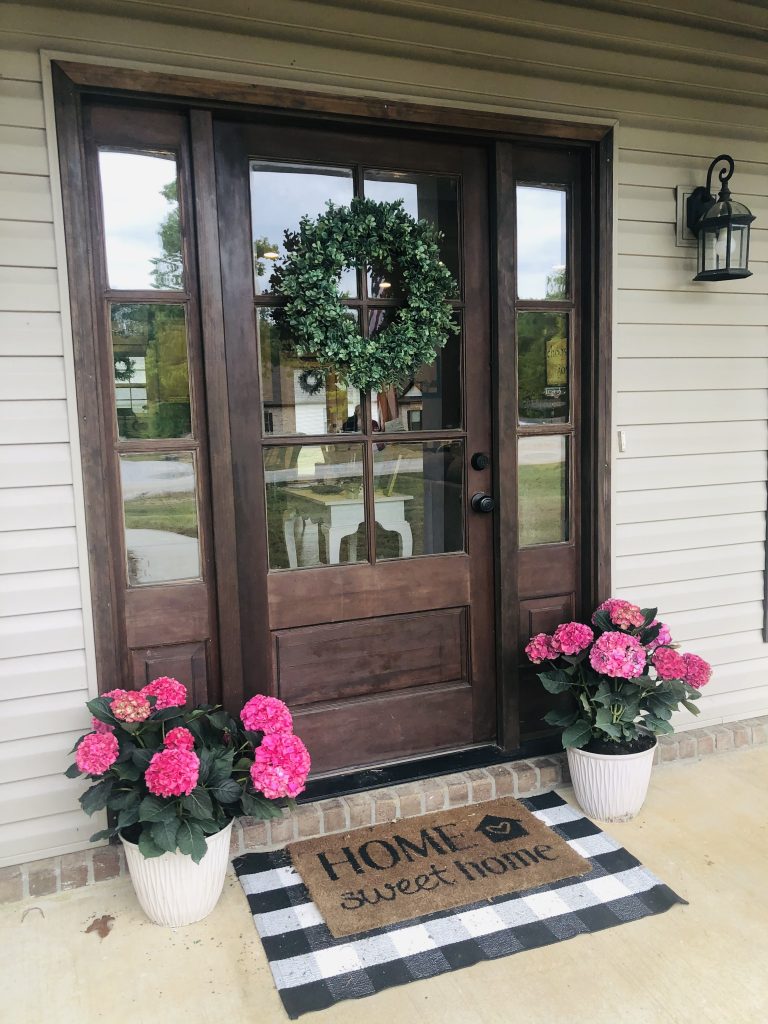
    Inside, and outside, at any Southern home, you will find gorgeous flowers! Southerners take great pride in their landscaping and gardens especially when they employ the services of professionals such as tree surgeon sussex. Don’t be scared to bring these flowers into your home, in a variety of ways. Floral decor can be found in wallpaper or accent chairs, in planters or pots on the front porch, or as a fresh centerpiece on a dining or kitchen table. Flowers are a simple way to add some Southern flair to your home. Grab some hydrangeas and put them by your front door, hang up some flower baskets, and start with some floral throw pillows inside, and you’ll be well on your way to achieving your Southern Pinterest board dreams! If you don’t have access to fresh flowers, then try tree branches, palms, or sprays from your yard, which will instantly fill a room, and create life and character. Get creative!

    Flowers are also the perfect way to show someone you care on their birthday, and did you know that each month has its own special meaning? Just like with birthstones, each birth month has a different corresponding flower. Why not check out this birth month flower guide to learn more!
    pretty southern front porch flowers

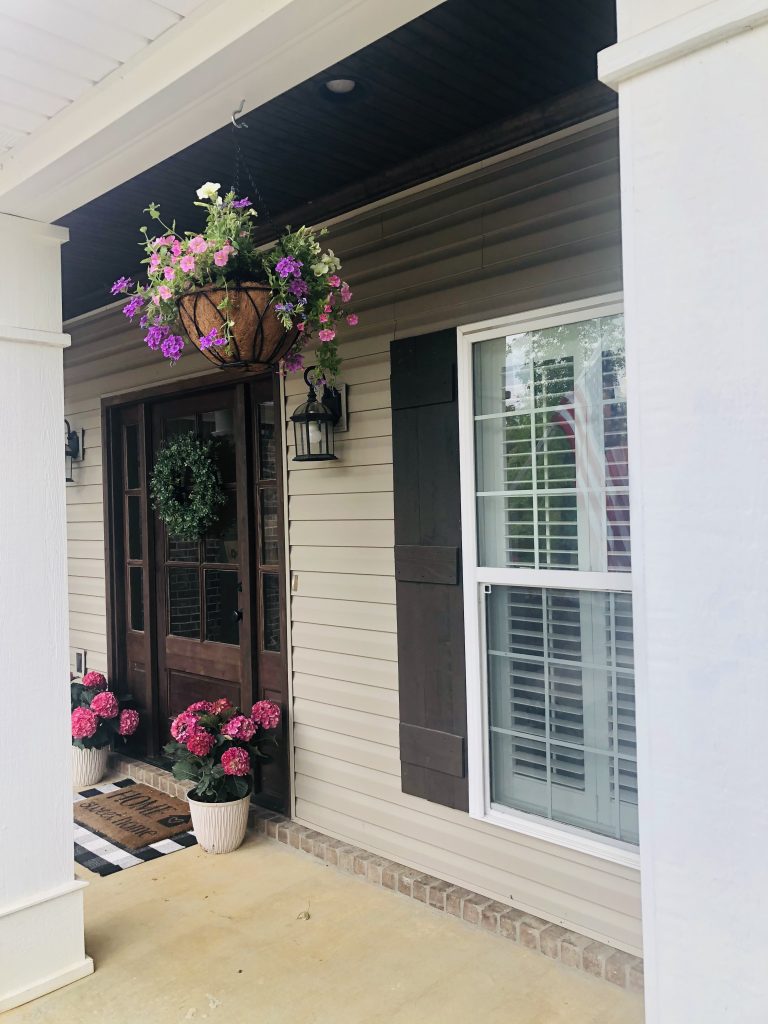
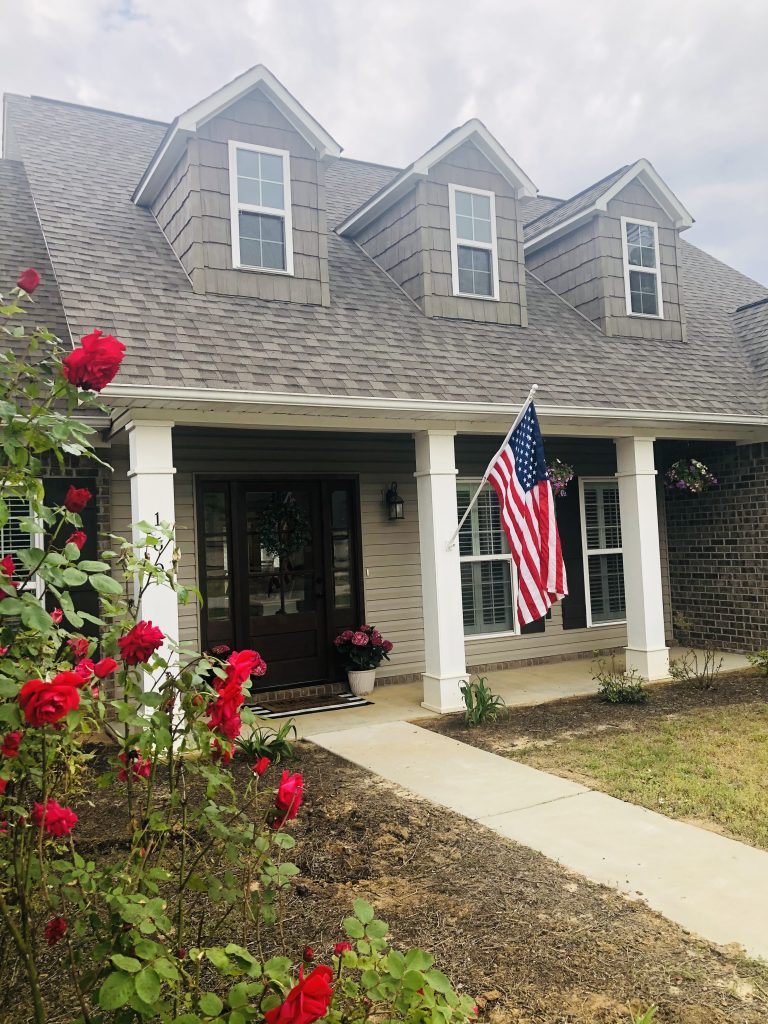
    3. Outdoor Space is Everything

    Southern homes are known for their beautiful front porches adorned with rocking chairs and custom timber furniture Melbourne. However, if your home doesn’t have a front porch, there are ways to make any outdoor space a Southern space like adding modern house number signs. Some simple tips to do this might be: Add a seating area, some flowers, and some cafe lights. Create a space that you find lovely, and that brings you comfort, and you’ve accomplished your own outdoor, Southern, space. Paint your front door a bright or bold hue, and don’t forget to hang a wreath! If it’s time to update your driveway, you can get the best block paving service at didsburydriveways.

    Additionally, you can buy a composite decking in Denver if you want to increase your curb appeal.

    pretty-southern-front-porch-hydrangeas-mississippi

    4. Let There Be Light

    The Southern homes that we all drool over tend to have a lot of natural light. If you have natural light in your home, highlight it with light and airy curtains. If your home lacks some natural lighting, don’t worry! Natural light can be created by the colors that you use in your home. A little paint will go a long way! Paint the walls light, neutral colors, or coastal colors, to best utilize the light that you have coming into your home. Also, Energy efficient lighting such as LED daylight bulbs are game-changers! They will instantly lighten and brighten your home, and your mood! These are fairly quick and cost-effective ways to invite some major Southern vibes into your living space. If you need to install new lighting fixtures, you may consider hiring this professional Electrician Rockwall, TX. Let the professionals from companies like Asbury Electric or contact your Littleton residential electrician at MZ Electric and let them handle this job. You can also visit a place like callbigfamily.com/lighting-installation/ for more guidance and assistance.

    Looking for an accent color? Try green. Green will help give your space an indoor-outdoor feel and is a common staple in Southern homes.

    5. Texturize Your Space

    What does that mean? Basically, add different kinds of materials or surfaces to your floor with great laminate flooring, tabletops, or walls. An example of this is to add some baskets or materials to a hall table, or a blank wall. Other ideas include, a colorful area rug, various natural fibers, playing with patterns, and again, adding some greenery. Southern style is often described as comfortable, yet sophisticated; rooms and spaces that are described as such, usually have lots of texture. When it comes to cleaning your carpet, you can visit a site like andysteamer.com for more helpful info! You may also want to consider hiring the professionals at Eco Clean Solutions as your best option.

    Where to Shop?

    Maybe you’re thinking that these are great ideas, but where should you to begin to look for these items? Start in your own home! Crazy, right? The truth is, all of us already have some Southern within us, meaning that somewhere in your home is an item that just needs to be fashioned a little differently. Look for any knick-knacks, baskets, plants, or pictures, and start to create your space. Check out local thrift stores, market places, and shops in your area to continue to add to your home’s decor. I just bought this lovely horse area rug last week and it’s just gorgeous!

    Are you a DIY-er? There are several tutorials online that teach everything from front porch planter boxes, to garage insulation as per First Defense Insulation. Grab your toolbox, (or your hot glue gun), and some burlap, and start a project or two!

    tupelo-mississippi-home-front-porch

    Pride of Ownership

    Every home is unique, and you are too. Your home should be a reflection of you, and if it is, then you’ve mastered step one of Southern decor. Southerners are proud of who they are, where they come from, and where they’re going. Blending past, with present, and eyes forward to the future is a common mantra. If you’re looking to create something that is both comfortable and charming, while telling your story… then see steps one through five above.

    Whether you’re channeling the beach or your inner steel magnolia, just remember that being Southern is first a state of mind, and then let that reflect in your living space.

    What’s your personal Pretty Southern style for your home? Please let us know your thoughts in the comments section below.

  • Cooler Painting: Your Ultimate Guide

    Cooler Painting: Your Ultimate Guide

    If you’ve never painted a cooler, you’re missing out.

    This is a super fun art project and awesome gift for a loved one (or yourself). After my third round, I think I have a pretty good handle on cooler painting. I heard about them all throughout college and maybe caught glimpses of girls’ painted cooler masterpieces on Facebook.

    Most of the coolers I saw or heard about were for fraternity formals; every now and then I’d see one done for another event, or just for fun. I didn’t know much about Greek life or culture, despite my best friend being Greek-affiliated, but I sure admired those coolers. I didn’t think I’d ever have the patience to create something that beautiful, but I wanted to try.

    So one day over the summer, I painted one myself. It ended up as a gift for my then-boyfriend; for my first cooler, it turned out great and I was super proud of it. I painted a small one for my dad for Father’s Day last year. This year, I finally painted a cooler one for myself. And I love it.

    I guess you could say I’m now a cooler painting pro.

    To paint a cooler, you will need:

    • Cooler (hard, sturdy)
    • Surface cover (old bed sheet or comfy bamboo sheets, towels, etc.)
    • Primer (I prefer the aerosol spray kind)
    • Acrylic paint
    • Paint pens (these come in handy for details)
    • Assorted paintbrushes
    • Painter’s tape
    • Tissue paper and marker (for tracing)
    • Clear sealant

    paint a cooler supplies

    I definitely recommend sketching your ideas for each panel of your cooler before you start priming and painting. My coolers have all had “themes,” so each panel revolved around that. My latest cooler is “Chattanooga” themed, largely inspired by some of my favorite sights around town and traditions from the 4th-division soccer club I support, Chattanooga FC. But if you’re the type who can paint right on your cooler, then go for it, more power to you.

    Step 1: Pick your cooler.

    Bigger coolers give you more space to get artsy and creative. My current cooler is about 20 quarts in size, which is perfect for my purposes. My dad’s is a little six-pack cooler, which was perfect for him. You can find an assortment of coolers at Target, Walmart or your local sporting goods store. Do not get a styrofoam cooler. It will fall apart in a minute. Get a hard cooler.

    Step 2: Sand your cooler.

    This step is crucial! Even if your cooler is already pretty smooth, give it a good sanding so it’s smooth and the primer and paint will stick to it. I’ve sanded by hand with sandpaper, and it takes a lot of time, patience and elbow grease. This time, my coworker was kind enough to sand my cooler for me with his electric sander. That was a much quicker process than sanding by hand.

    After sanding, give your cooler a good wipe-down with a wet cloth, to clean off any remaining dust and sand. You’ll want a nice, clean surface to work on.

    Step 3: Spackle any logos or embellishments.

    Most coolers have some kind of raised logos and embellishments on the top or sides. All it takes is a little wall putty and some smooth strokes. Give yourself as smooth a painting surface as possible. Let the putty dry and then sand it down so it’s even with the rest of the surfaces. Give your cooler another wipe-down and get ready for the next step: priming.

    paint a cooler preparation

    Step 4: Prime it.

    Painting straight onto the surface doesn’t work because the paint has nothing to “stick” to. I used an aerosol spray primer and that worked perfectly. However you prime your cooler, make sure you do so evenly. If it takes more than one coat, that’s cool, too. I usually do two coats of primer just to be safe.

    Step 5: Paint it.

    Now we get to the fun part!

    I had each side of my Chattanooga-themed cooler planned and designed well before I primed and painted. I lined the top with blue painter’s tape and marked off each panel with tape so the different base colors wouldn’t mix. Once the base layers were dry, I lightly sketched some of my designs with a pencil, or at least marked some lines so my text would be straight.

    Then, it’s all about the paint. I highly recommend having a variety of brushes and some paint pens for smaller designs and details. Paint pens are especially great for text. I’m a terrible paint free-hander, so I made sure I had paint pens in the necessary colors.

    If you’re not comfortable freehand painting any of your designs or text, there’s a neat tracing method that works pretty well. Trace your desired image or design onto a piece of white tissue paper with a pencil, and then tape the tissue paper to your cooler. Then, trace that with a Sharpie or thick marker. The ink will bleed through and transfer onto your cooler, giving you a nice little outline to paint. You can also read about mixing paint with epoxy on Epoxy Resin store. This trick is a cooler-painting game changer.

    paint a cooler tracing

    The edges of the cooler are prime opportunities for creativity. You can paint something as simple as a bowtie along the edges, or even just some colorful stripes. One time, I saw a cooler with beer tap handles on the edges. Talk about creative! I went simple and painted my edges red and navy with three white stars on each (for the Tennessee state flag, of course).

    Step 6: Seal it.

    A clear lacquer sealant should do the job. I’ve also used good ol’ Mod Podge for smaller projects. Like with primer, make sure you seal your cooler evenly, and two coats is fine if you think your cooler needs it. I say an extra coat can’t hurt.

    And now for my finished project…

    painted cooler

    The pink front is an homage to the famous “Chattanooga Choo Choo” song, which is sung in the 29th minute of every home Chattanooga FC match. The light blue side was inspired by CFC’s supporter section, the Chattahooligans, and one of my favorite songs we sing. Chattanooga, we are here! 

    cooler-side-2

    The back, navy side will be updated with the score of each match. And I couldn’t paint my Chattanooga cooler without a nod to two of the city’s most iconic landmarks – the Walnut Street Bridge and triangular Tennessee Aquarium roofs.

    Cooler painting is quite an undertaking, but a fun undertaking. You can make your cooler as special and meaningful as you like, especially if it’s meant as a gift. The good news is, there is no limit to cooler painting; your options are endless. 

    Once you paint one cooler, you’ll want to paint another. And another… and another. But if you need to repaint your home, it’s better to hire a professional at Alex Trend Painters.

    Have you ever painted a cooler? How crafty are your cooler painting skills?

  • Homemade Apple Butter is Pretty Southern

    Homemade Apple Butter is Pretty Southern

    applesOne of my favorite fall activities is apple picking. There’s something about plucking big, juicy apples from towering branches that brings out a childish joy in me. I always come back with a peck or more of fresh, sweet fruit that I know I’ll use for something delicious at home.

    Earlier this fall, I went apple picking at an orchard in North Georgia. I used half of my bounty for crock-pot applesauce, which is one of my favorite apple recipes. But as of a couple weeks ago, I still had about ¾ of a peck left. I wanted to try something new with those. So I channeled my great-grandmother and made apple butter, and taught myself how to can. All in one day (well, technically two days, since the apple butter sat in the crock-pot overnight).

    I’d been wanting to try canning for a while. Our family friends make homemade jam in the summer with fresh-picked fruit, and they always share with us. But I’d never bitten the bullet and tried it myself. All the supplies are expensive, especially for someone on a budget. Fortunately, I grabbed some mason jars on sale at Michael’s and JoAnn’s and stocked up. There’s no such thing as “too many mason jars.” There’s always a use for one.

    Apple picking at R & A Orchards, Ellijay, Ga.

    I had absolutely zero idea what I was doing: how do I prepare the cans? Do I have to heat them? How do I even make apple butter? Is there butter in apple butter? (There is, in fact, no real butter in apple butter.) So, to Pinterest and Google I went. My great-grandmother wouldn’t have had that luxury, but I did, so I used it. Canning in a boiling water bath didn’t sound too difficult, albeit time-consuming, and it beat using a pressure-cooker type apparatus. I settled on that method, and then searched for a reasonable recipe.

    Fortunately, almost anything can be made in a crock-pot, including apple butter. I found a good starting point and added my favorite spices and flavors to put my own spin on the recipe.

    Here’s the recipe I ended up making:

    Spiced Apple Butter

    • 12 apples, ranging from fist-sized to softball-sized
    • ½ cup water
    • ¼ cup brown sugar, light or dark
    • 1 tsp cinnamon
    • 1 tsp nutmeg
    • ½ tsp pumpkin pie spice

    Version 2Instructions:

    1. Spray your crock-pot with cooking spray to prevent sticking.
    2. Peel and chop apples, and put them in the sprayed crock-pot.
    3. Add spices, and pour water over the apples.
    4. Stir well, so that the water and spices cover the apple chunks.
    5. Set your crock-pot on low, cover and let it go for at least 8 hours. Overnight is best.
    6. After 8 hours (or the next morning), crank it up to high, prop the lid open with a spoon, and let it go for another 3-4 hours. Don’t stir it. Just let it cook down.
    7. Once the apples are cooked down and take on a medium brown color, turn off the crock pot. Stir until the butter reaches your desired consistency or chunkiness.
    8. Can according to your preferred method.

    I like my apple butter smooth, so I whisked it until it was smooth. An immersion blender would do the trick, too. If you prefer chunkier apple butter, give it a good, careful stir, and leave the butter at your desired chunkiness. The finished product is delicious on a warm biscuit, or swirled in a bowl of oatmeal.

    14-ish hours later, I ended up with 10 cans of apple butter. Fortunately the holidays are around the corner, and little cans of homemade apple butter will make a wonderful gift.

    My great-grandmother would be proud, too. For my first-ever batch of apple butter, it turned out pretty delicious. That’s pretty Southern, if you ask me.